Currently, my newest task is to change up my recipes to be dairy free. After the boy was taken off dairy I realized I am seriously going to need to change my recipes. Apparently I use a lot of dairy in my cooking.
This recipe will make 3-2+ pound loafs. I usually freeze the other two for later baking. This can also be used for meatballs.
6 pounds Ground Beef (1 warehouse store tray)
2 Cups Chicken Stock
4 Eggs
1 Cup Italian Bread Crumbs
1/2 Onion, Grated
3 Cloves Garlic, minced
2 Tablespoons Dried Basil
1 Tablespoon Dried Oregano
1 Teaspoon Salt
1/2 Teaspoon Ground Pepper
Preheat oven to 350 degrees. In a large bowl whisk egg with chicken stock. Stir into egg mixture Onion, Garlic, Basil, Oregano, Salt, Pepper, and Bread Crumbs. When mixture is nice and soupy add Ground Beef and blend. I find it easier to use my hands for this. When well blended divide into thirds and place each third into a loaf pan. Cover with your favorite BBQ Sauce. Bake uncovered at 350 for about an hour to hour and 15 minutes. Check internal temperature when center reaches 170 degrees meatloaf is ready. Remove from oven and let rest for 5 minutes. Serve. If there are any leftovers drain off juices before storing or the meat will get soggy.
For Freezing I vacu-seal in individual 2 pound blocks and defrost later then place into loaf pan and cover with bbq sauce before baking.
For Meatballs. Round meat into individual meatballs at your desired size and set aside. Heat Olive Oil in pan filing about 1/4 of the way up side of pan with Olive Oil. I use a Cast Iron pan for my frying for better heat conducting. Fry meatball in Olive Oil over medium heat. Using tongs, turn ever 2-3 minutes to brown on each side. When cooked through remove to a large bowl covered with foil and let rest while cooking the remainder. Or plop into your favorite sauce. Or make meatball sandwiches. Either way....Enjoy!
As Granpa used to say "See ya round like a donut!", SoCal Marisa
Random thoughts, stories, and day to day activities in the life of a homeschooling Mom.
Showing posts with label Recipes. Show all posts
Tuesday, August 2, 2011
Thursday, July 7, 2011
Mango con Chili! Recipe
Summertime = Fruit
Right?
Well I have to say my most favorite fruit is the Mango. Growing up we would travel to the grandparents (Mom & Tata or Granma & Granpa's) second homes in Ensenada, Baja California, Mexico. Just a few patient adults, a pack of kids and a lot of sand and surf. Sometimes as we would wind along the Old Toll Road we'd stop at the roadside for fruit or even sometimes lobster. Sometimes it would be to slurp coconut milk from fresh coconut or to have a mango on a stick or fruit cocktail or even seafood cocktail (be careful though of the Montezuma's Revenge).
Aaaaah summertime. Those are my most favorite memories. We've all grown up now. Grown apart in some cases. But I still have those memories. Fiesta's in the middle of camp. Fruit. Fish Tacos. Pan, Fishing, body surfing, searching for seashells, and the big horn calling the workers in at the factory. Churros at La Bufadora (and this time you say Churro with a whole lot of r's and a lot of proper pronunciation, not the white man way of chew-rows). Plus they are the right kind too, in the brown bag that's almost see through because they were just fried for you.
While mangoes are good on their own. Peeled just right and removed from the seed, if properly ripened they are super juicy and have such intense flavor. The best way though is with a sprinkling of fresh lime and a dash or two of pico de gallo. Mmmmmmm. Now that's summertime for me. Today I decided to cut up a bunch of mangoes and a little watermelon and prepare it the way I like it. mmmmmm. It's pretty good. You should try it. I even have the white people in this house demanding for it. Gotta love summertime!
Tomorrow I think I'll cut up the pineapple and add that to the mango and watermelon and see how long it takes for the kids to devour that!
Mango con Chili
1 Mango (peeled, seeded, and cut up)
1 slice fresh lime
dash Chile Powder or Pico de Gallo
Mix all together, serve, and eat immediately.
See ya round like a donut!, SoCal Marisa
Monday, June 20, 2011
Macaroni Salad
Serious good stuff. Now I don't know if this is a Mexican thing or just something with my particular family tree, but there is always some Macaroni Salad whenever there is a family function. Make it the day before so your flavors can get a chance to know one another and enjoy it at your next BBQ.
1 pound elbow macaroni, cooked al dente, drained, cooled and set aside
4 Stalks Celery, peeled of string and chopped
1 Small Sweet Yellow Onion, Grated, drained
2 Cloves Garlic, finely Chopped
1 Medium Can sliced olives, drained
2 Cups Mayonnaise
1 TSP Salt
1/2 TSP Black Pepper
Combine all ingredients. I started grating my onion for those who fear the look of onion. It's so much easier on the eyes to grate using the Cuisinart. I find it easier to mix together with my hands. Sure they get all messy but everything mixes rather nicely. If too dry ad more mayo and more salt and pepper if needed. Chill at least 12 hours and enjoy!
See ya round like a donut!, SoCal Marisa
Sunday, March 20, 2011
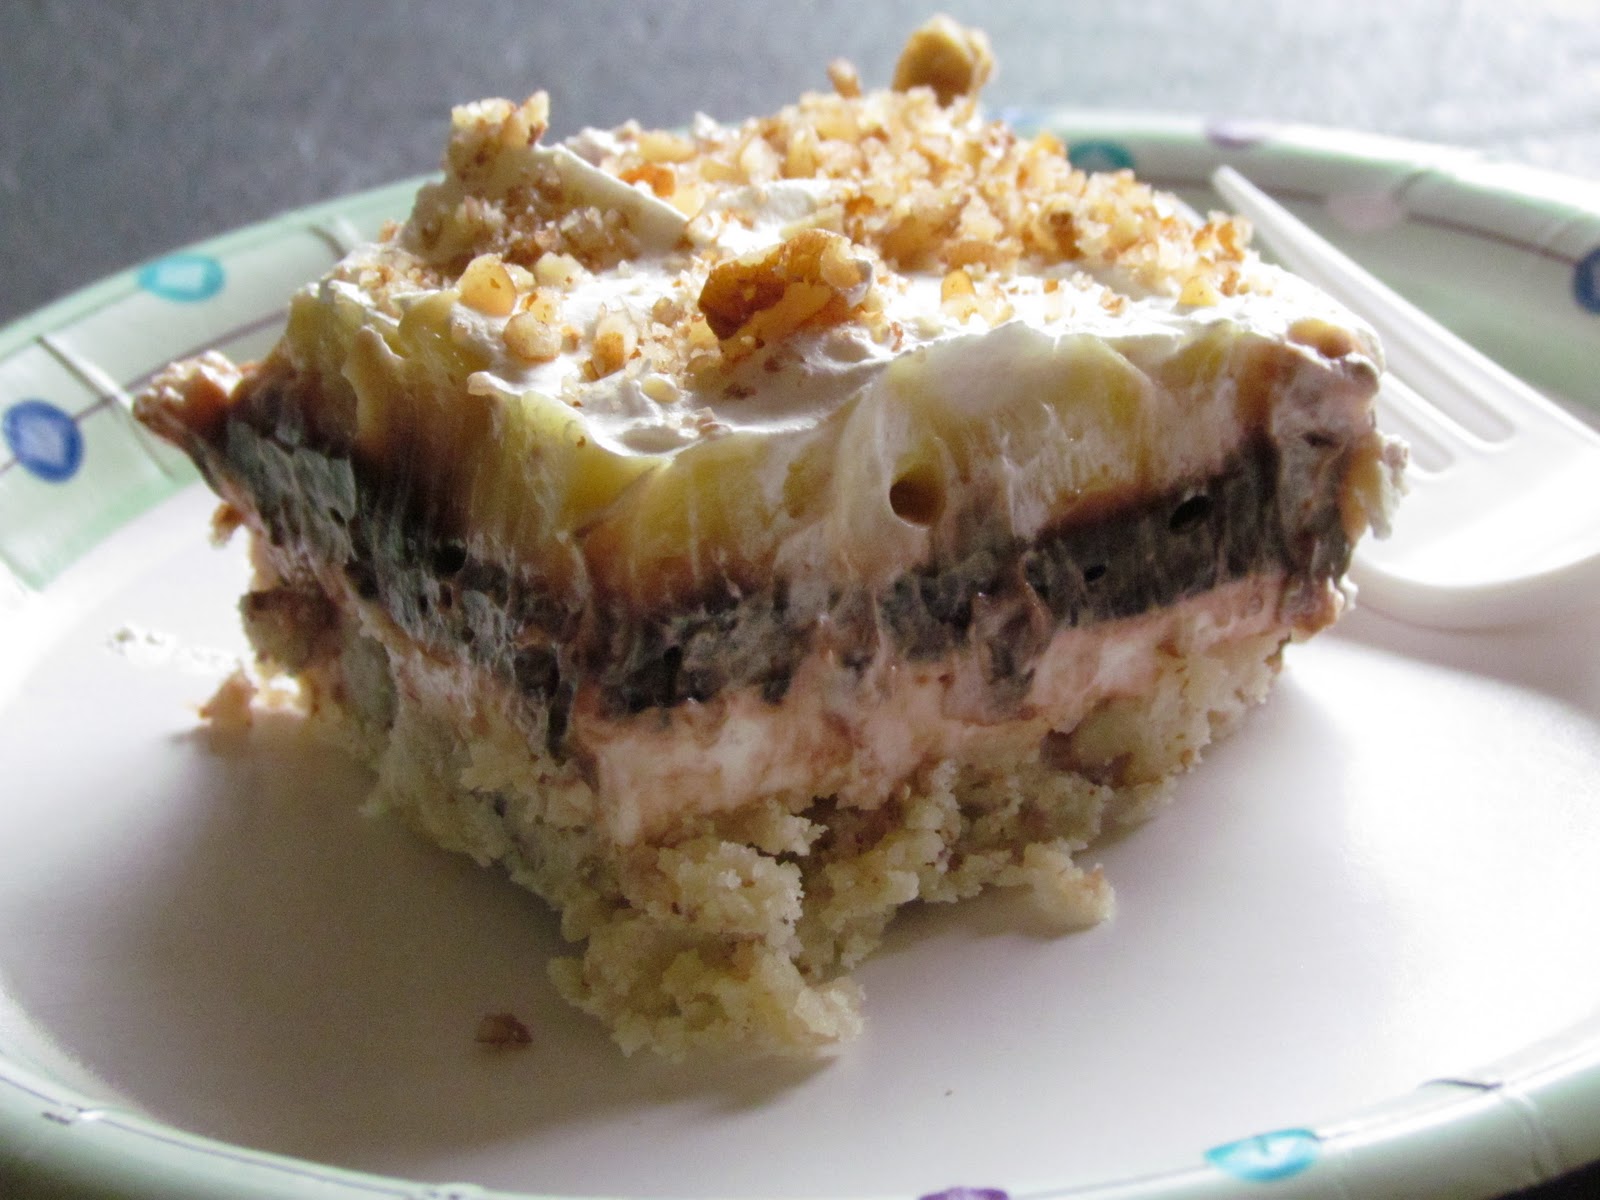
Yum Yum Dessert Recipe
Recently it was my Bunco partner Shelly's and my turn to host Bunco. We had many a wonderful dish for the ladies that came to play. One was this Yum Yum Dessert. I was introduced to this one as a child and it is still one of my favorites. Granted I have made a few adjustments for my own tastes but it's still on my top 10.
Yum Yum Dessert
1 cup butter softened
1 cup flour
2 cup chopped Pecans
1 8 oz package cream cheese softened
1 cup powder sugar
2 cup Cool Whip whipped topping
1 large package instant chocolate pudding mix
1 large package instant vanilla pudding mix
4 cups cold milk
1st Layer – Melt 1 cup butter in an 8x13 inch Pyrex pan. Add 1 cup flour & 1 cup chopped nuts. Mix and press flat into pan. Bake at 350° for 10 to 12 minutes until light golden brown, cool.
2nd layer – beat with mixer 1 8 oz package of cream cheese & 1 cup powder sugar. Fold in 1 cup cool whip. Spread on top of first layer.
3rd layer – Mix 1 large package instant chocolate pudding with 2 cups cold milk. Spread on top of second layer.
4th layer – Mix 1 large package of instant vanilla pudding with 2 cups cold milk. Spread on top of third layer.
Final Layer – Spread 1 cup cool whip on top of the fourth layer. Sprinkle with 1 cup of chopped nuts. Cover and chill overnight.
Yield: 24 squares, 294 Calories
Prep Time: 1 hour
Chill Time: Overnight
Until Next Time, SoCal Marisa
Thursday, February 10, 2011
Minestrone Soup Recipe
| Vegetable Minestrone Soup with a hunk of buttered bread |
I am watching my calories and am always looking for good meals that are low in calories. I found this really good recipe and only changed a few minor things to accommodate our taste buds. The family just loves this minestrone. I only include Cannellini beans and forget the kidney beans. We don't like those. Hope you enjoy! You can add meat like sausage, bacon, or other fatty full flavored meat if you really need the meat but it's really not necessary. The soup is pretty hearty without meat.
Ingredients:
2 Tablespoon Olive Oil
1 Yellow Onion, diced
2 Large Carrots, peeled and chopped
2 Large stalks Celery, peeled and chopped
3 Garlic Cloves, minced
1 Pound Fresh Spinach
1 Large Potato, peeled and cubed
1 Fresh Rosemary Sprig
1 14 Ounce Can Diced Tomatoes in their juice
1 Can Cannellini beans (white Kidney beans), drained and rinsed
4 Cups Chicken Broth
1 Ounce piece of Parmesan Cheese Rind (Just get the wedge of Parmesan cheese next time and instead of dumping the rind keep it for your soup. It will keep in the freezer until you are ready to use)
1/4 Cup Dried Macaroni Pasta
| Look how happy the soup is in that pot. Look closely and you can see the cheese rind just perking away giving it's nice salty flavor to the soup! |
Directions:
Heat Olive Oil in a large pot. Add onion, carrots, and celery. Saute until onion is translucent, add garlic and stir. Add spinach and potato to the mixture. Saute until the spinach wilts. Add Chicken Broth, rosemary sprig, and tomato's to the mixture and stir. Add Parmesan Rind and pasta to soup and let simmer until potato's and pasta are cooked. Add beans and cook until soup thickens. Remove Parmesan Rind and Rosemary stem and serve.
We eat with crunchy sourdough bread and butter with a nice green salad.
Serves 6, 221 Calories Per serving using myfitnesspal.com
Thursday, January 27, 2011
Penguin Day Today!
Fun day in Kindergarten!
I just love Kindergarten!
Until Next Time, SoCal Marisa
So today was another fun day in Kindergarten. It was Penguin Day where the kids got to learn all things penguin related. They made penguins and penguin cupcakes (Recipe Follows) and watched a penguin movie...unfortunately there was a cliffhanger and we have to resume on Tuesday.
On a side note Lorraine and I slipped out of the classroom when the kids were at lunch recess and took a quick trip to My Delight Cupcakery in Ontario for a yummy Samoa Cupcake. I also picked up Chocolate Salted Almond Caramel & Carrot Cake. My Samoa was sinful! YUM. Need to go back tomorrow!
OK, back to penguin day. We had a super great day spending it with the kiddos. They really enjoy building their own snacks and are really getting used to frosting things. Such pros!
Penguin Cupcakes
White Cupcake
White Frosting
Chocolate Chip Morsels
Orange Mini M&M's
Keebler Grasshopper Cookies
Goldfish
Really this recipe is all about assembly. White cupcakes (in white wrappers of coarse) frosted with white frosting. Take two Grasshopper cookies and cut them in half. Eat one half. Place the other half on top of cupcake for the head and the two remaining halves are now the wings of the penguin. Dip chocolate chip morsels and mini M&M's in the frosting and place on top of cookies for the eyes and nose. Place the Goldfish into frosting and VIOLA! Penguin Cupcakes! Our Kindergartners LOVE Food Crafts!
I just love Kindergarten!
Until Next Time, SoCal Marisa
Sunday, January 16, 2011
Finnish Pancakes Recipe
My good friend Maria shared this recipe with me and I haven't used it in a while but this week I dusted off my book and used it for MOPS breakfast. I had great hopes of taking some wonderful pictures of it sitting on our MOPS buffet table but unfortunately there was not one piece left for me! All gone before I even got to the table and I thought as I was making it that maybe I should make a second pan of them. Well, I guess I should have! hahaha oh well hind-sight I guess.
So the weekend arrived and I realized I really needed to get that picture for you guys. It was my mission and I needed to accomplish it. What I do for you people.....So naturally I made some before the game yesterday. & of course I HAD to eat some. It's what a girl has to do in order to get the shot!
Finnish Pancakes
4 Eggs
1/4 Cup Sugar
Pinch of Salt
2 Cups Milk
1 Cup Flour
1/2 Cup Butter (1 Stick)
Topping (Make To Your Liking)
2 TBS Cinnamon
2 TBS Sugar
Prehead oven to 400 degrees. Put milk, eggs, sugar, salt and flour in blender. Blend well. Place 9x13 pan in oven with butter in it. After it melts, tip to butter the edges well and pour excess into blended mixture and blend again. Pour mixture into hot 9x13 pan. Sprinkle with cinnamon sugar; place in oven. Done in about 30 minutes. Can be served with yogurt, fruit, syrup, powdered sugar, etc. ENJOY!
Serves 12. 164 Calories each serving. Using the myfitnesspal recipe generator.
Until Next Time, SoCal Marisa
Monday, December 20, 2010
"Gingerbread" Houses Recipe
Merry Christmas!
So in Kindergarten we made Gingerbread Houses during our Christmas Party. Well, really they were Graham Cracker Houses but the kids really didn't seem to mind at all. I assembled 16 base foundations in order for the kids to decorate the next day. I used Royal Icing as the glue and prepared little baggies to be used like mini pastry bags for each kid. We nipped the edges and they had a blast. To be honest, the classroom fell silent while they began their work. Such serious little builders!
Following are the steps for making your own Gingerbread Houses. But first you need to make your Royal Icing.
Royal Icing
3 TBS Meringue Powder
1 LBS Powder Sugar
6 TBS Warm Water
Mix together in stand mixer for 7 minutes until peaks form and icing is ready. Dries super fast so work fast or cover until ready to use.
Needs:
Graham Crackers
Royal Icing
Lots and Lots of Hard Candies, Cookies, Pretzels, Cereal, anything can be used really.
Following are steps to assemble houses and the order in which I found easy. I made enough houses that I didn't have to worry about dry time. If only making one or two you should take dry time into consideration or your house will fall apart. I used one graham cracker for each side simply because I needed to make so many. You can use as many as you like for larger homes. I completed one step on all 16 before moving onto the next. Have fun and good luck!
Pipe royal icing onto one side of graham cracker. This is your first wall.
Attach second wall to first.
Attach third wall.
Attach fourth wall.
Built roof.
Pipe icing at roof line.
Attach roof & pipe icing along center of roof to reinforce. Now they are ready to decorate.
Merry Christmas!
Until Next Time, SoCal Marisa
Friday, December 10, 2010
Mexican Rice Recipe
This recipe can be doubled or even tripled to accommodate your group size. The kids just love this rice and can eat it without anything else. This will be a fluffy rice if you trust the process.
Ingredients
¼ cup Olive Oil
1 cup white rice
¼ cup sweet yellow onion, chopped
1 garlic clove pressed
2 ¼ cups chicken broth
¼ cup tomato sauce
Salt to taste
Pepper to taste
Directions
In a frying pan start oil on medium heat, make sure there is enough oil to coat the bottom of the pan. Add onion and fry to slightly translucent. Add rice then garlic. Fry just until brown. Add chicken broth and tomato sauce. Add salt & pepper to taste. When liquid comes to a simmer cover and reduce the heat to lowest setting and leave alone for 15 minutes. Do not stir. Do not uncover. Turn off heat and let rest for 15 minutes. Do not stir. Do not uncover. The rice will further steam and get nice and fluffy. The hard part is not peaking and trusting the process. If you really need to know what’s going on in the pan, use a glass lid. Enjoy!
Serves 8 (1/4 cup servings) 144 Calories, using the myfitnesspal recipe generator.
Until Next Time, SoCal Marisa
Guacamole Recipe
Guacamole is very yummy and good with just about anything. It’s easy to make and can be as spicy as you are willing to eat. Remember to use gloves for your hands to protect from the Jalapeno burn or cover your hands with oil like a lotion before handling the jalapenos to keep your hands from absorbing the chili oils. They will of course be slippery so be careful when handling a knife.
Ingredients
4+ Ripe Avocados
¼ cup to ½ cup Sweet Yellow Onion, grated
1-2 Garlic Clove Minced
1-2 Jalapenos Minced with vein & seeds removed
¼ cup to ½ cup Cilantro Minced
½ to 1 tsp Chili Powder
Salt to taste
Pepper to taste
½ Lime
Directions
Guacamole should be made to taste. It’s always best to start with small amounts of chilis then taste as you go just so that it’s not too powerful for you. No two chili’s are the same even from the same plant so be careful for your heat. Cut avocados and remove the seeds. Spoon avocado into a bowl and mash with a fork or bean masher. Add the remaining ingredients to taste. Lime is used to keep the Guacamole from browning so use in moderation. If you don’t have lime on hand you can use lemon or even vinegar to slow down the browning process. I always cover with plastic wrap leaving no air between the Guacamole and wrap to further slow down the browning. Refrigerate for at least 15 minutes so the flavors can mingle. Stir and serve.
Serves 8, 129 Calories, using the myfitnesspal recipe generator.
Until Next Time, SoCal Marisa
Beef Taquito's Recipe
These Taquitos were served at Bunco and were an absolute hit. Most everyone was stunned that I used canned beef rather than cooking a roast. Of course Taquitos are best served with a healthy dose of Guacamole, Beans, & Rice, recipes follow. You can definitely use a beef roast for taquitos, but I'll be honest I prefer to use the canned beef. The meat doesn't seem to dry out as much when using canned beef.
Ingredients
Corn Tortillas
Oil
Canned Beef (1 can makes approximately 8) or roasted beef.
Directions
Open can and drain beef, do not rinse. Shred beef using either hands or fork. No need to season or cook the meat. Remove fastener from corn tortillas but keep them in the bag and microwave at minute intervals until they are steamy. This makes the tortillas easier to roll without cracking. Place shredded beef in a line down the middle of a tortilla and roll. Place seam side down and repeat. No need to use tooth picks. Heat oil to a frying heat in a pan, use enough oil to cover the Taquitos at least by half. Place Taquitos seam side down and hold with tongs for a few seconds so that the corn tortilla will seal in the hot oil and not unfurl. Repeat to fill your pan. Fry until lightly brown. Flip to fry other side. Fry until lightly brown. Remove from oil and drain on paper towels. Keep an eye on your oil so that it does get to hot and start smoking. I use a splatter screen to reduce the oil spitting. Place cooked Taquitos uncovered in an oven on lowest heat setting to keep hot and repeat until finished cooking.
Until Next Time, SoCal Marisa
Taquito Dinner
OK, I don't think I really have to say much about Taquitos now do I? I made them the other day along with some Guacamole, beans & rice. I'll post each recipe individually for easier searching. Have fun and good luck!
Until Next Time, SoCal Marisa
Tuesday, December 7, 2010
Nutty Oatmeal Chocolate Chip Cookies Recipe
Have I ever mentioned to you just exactly how much I love this time of year????? NO!?! Well I do. & it's not about the presents, although getting gifts is awesome, it's about the season. Jesus's Birthday. Shopping. Decorating the house for the holidays. Parties. Christmas Cards in the mail. Baking. Definitely eating what we bake!
Today was cookie exchange in Small Group and all my joys of baking came into play. Um, baking and then sharing. Let us not forget the gathering with the gabbing and a nice hot cuppa. Yup, today was one of those days. Last night I stayed up late getting my 3 dozen ready to share this morning. The good thing about me baking is I get to share my recipes with everyone and now I'm starting to remember to take pictures of what I make. This one is adapted from under the lid of the Quaker Oats can. We don't like raisins and I really love to use nuts in my baking so here is my little yummy cookie. I use Butter not that evil abomination called margarine and double bourbon vanilla in place of regular or imitation.
This one is Brian's favorite and when he got home last night he made a bee-line for the kitchen only to be turned away until my 3 dozen were counted and secured for group. Anyway, I hope you enjoy the recipe as much as we do!
Ingredients
1/2 pound (2 sticks) Butter softened
1 Cup Firmly Packed Brown Sugar
1/2 Cup Granulated Sugar
2 Large Eggs
1 Teaspoon Vanilla Extract
1 1/2 Cups All-Purpose Flour
1 Teaspoon Baking Soda
1 Teaspoon Cinnamon
1/2 Teaspoon Salt
3 Cups Old Fashioned Oats
1 Cup Chocolate Chips
1 Cup Pecans, Chopped
Directions
Pre-Heat Oven to 350º. In Stand Mixer beat together Butter and Sugars until Creamy. Scrape Down Sides. Add Eggs & Vanilla; Beat Well, Scrape Down Sides. In a separate bowl combine; Flour, Baking Soda, Cinnamon, & Salt; mix well. Add Flour mixture to Butter mixture, mix, scrape down sides. Add in Oats, Chocolate Chips, & Pecans. Drop rounded teaspoons onto ungreased cookie sheet. Bake for 10 minutes or until golden brown. Cool 1 minute on cookie sheet; remove to wire rack to complete cooling.
Makes about 4 dozen cookies. 133 Calories, using the myfitnesspal recipe generator.
*Recipe can be used for bar cookies as well. Bake 30-35 minutes in an ungreased 13 x 9” at 350º
Until Next Time, SoCal Marisa
Monday, November 22, 2010
Macaroni & Cheese Recipe
I have been making this recipe for just about every one of the kids birthday parties. It's become a family favorite. When I make it I usually split the recipe in two square containers; one for the oven and the other for the freezer for later use. We rarely have leftovers!
- 1 to 1 ½ cups uncooked elbow macaroni, rigatoni, or spinach egg noodles (about 6 oz)
- ¼ cup butter
- 1 small onion, chopped (about 1/4 cup) (I prefer to grate the onion so no one notices it)
- ½ teaspoon salt
- ¼ teaspoon pepper
- ¼ cup flour
- 1 small clove pressed garlic
- 2 cups milk (I use evaporated milk)
- 8 oz cheese shredded, I blend sharp cheddar, monterey jack, & parmesan cheese
- Parmesan cheese
Cook macaroni as directed on package, drain. Cook and stir butter, onion, salt and pepper over medium heat until onion is slightly tender. Stir in flour. Cook over low heat, stirring constantly, until mixture is smooth and bubbly; towards the end add garlic, remove from heat. Stir in milk. Heat to boiling, whisking constantly. Boil and stir 1 minute; remove from heat, Stir in cheese until melted.
Mix macaroni and cheese sauce and then place macaroni in buttered 9 x 13" casserole, cover with Parmesan cheese. Bake covered in 375 degree oven for 30 minutes. Uncover and bake 10 minutes or until slightly brown.
Note: For a creamier sauce add more milk and/or cheese. Adjust to your taste.
Serves 12, 196 Calories, using the myfitnesspal recipe generator.
Until Next Time, SoCal Marisa
Thursday, November 18, 2010
Turkey Day & Turkey Cookie & Acorn Recipe
Today was Turkey Day in Kindergarten and I am just so thankful I get to re-live my youth with my children! The things those kids get to do makes my days so full. We had a super busy day today and I'm exhausted!
Bell rings and class begins. Today we started working on our placemats. Then we colored our Turkey Books. We moved into our first snack craft of Acorns to be eaten before first recess. We do this so they can burn their energy on the playground. Smart moms hu? Super easy snack craft and they tasted pretty good too. Grab a doughnut hole, in this case we had glazed donught holes. Slather the top with chocolate frosting, dip in toffee candy crunch pieces, and spear with a pretzel. Went over like gang-busters. We had a few kids who were a little nervous at first but I tell ya, not an acorn remains. Kids had a blast with this one.
Then we continued to work on our placemats and started on our Turkey Centerpieces. Ahhhh the amazing things one can do with a toilet paper roll and construction paper. Unfortunately this is a bad picture of the sample but the children did a pretty good job. Take your average toilet paper roll. Cover in brown construction paper. Have the children trace both their hands, color, and cut out. Those will be the feathers. Add a red construction paper waddle and orange construction paper beak, some googlie eyes and you have your Turkey Centerpiece. Now what mom wouldn't want this from their kiddo? Mine left his at school, so I'll get mine after break. [sigh]
Let's see we finish up our color crafts and clean up. Then the children get to enjoy our Thanksgiving Feast of Chick-Fil-A Nuggets, Mashed Potatoes, & Corn. Love those nuggets! It's nice sharing a meal together.
Last snack craft before our movie and close of the day is our Turkey Cookie. We start with a base of a plain sugar cookie. Then uses bakers cement (royal icing) to adhere a peanut butter cup to the lower center of the cookie. More cement and add a nutter-butter. You have now completed the body. Next we need to give our bird feathers and in this case we used candy corn. Jelly Bean waddle and beak and m&m mini eyes finish off our snack. CAN YOU SAY SUGAR RUSH? The kids got to devour their cookies and some homemade pumpkin bread while watching A Charlie Brown Thanksgiving
and finally the dismissal bell rang! Now how's that for a day in Kindergarten?!
I'm bushed and in need of a nap! Nightie Night!
Royal Icing
3 TBS Meringue Powder
1 LBS Powder Sugar
6 TBS Warm Water
Mix together in stand mixer for 7 minutes until peaks form and icing is ready. Dries super fast so work fast or cover until ready to use.
Until Next Time, SoCal Marisa
Friday, September 24, 2010
Homemade Yogurt
So earlier this week the boy and I decided it would be fun to make yogurt. A while back I purchased a yogurt maker and it's been sitting here mocking me. Every time I walk into my office and see it on the shelf it yells at me and laughs. Why, you ask? I love gadgets. I have sooo many gadgets in this little sixteen hundred square foot house. Gadgets for the kitchen and my crafting - there really isn't enough room for them. What I need is a couple hundred extra square feet and a few hundred thousand dollars to make the types of rooms I need in order to actually use all of my gadgets properly. Oh and I need the time to play with them.
Back to the yogurt maker. I was at Tuesday Morning looking for a birthday gift for my MIL and saw the Waring Pro Yogurt Maker
sitting on their shelves. I have been wanting a yogurt maker for quite some time and have just not made the purchase. So naturally since I was already in a buying mood I purchased 2. After all my MIL shouldn't be the only one who benefits from this gift.
The gift was wrapped and given and she even used it a while back. & still my yogurt maker mocked me. I didn't ignore it completely I did open the box and check everything out. Read the manual and recipe book and have to say I wasn't too impressed with the recipes. They just didn't make sense to me about having all those ingredients for yogurt. So I decided I needed to research further.
More mocking from the yogurt maker in the other room. This time its voice is getting louder. Oy. I decided it's time for some internet research. Recipe searching begins. I even check out youtube to see if anyone has posted about this subject and YES they have. To be honest I wasn't interested in regular yogurt, I was more interested in Greek Yogurt which is a lot thicker than standard yogurt. We tend to like that more in this house. All of my searches proved successful. I found a few recipes that weren’t too involved and looked decent enough. Watched a couple videos on how others made their yogurt. One guy did it all on his stove and was very careful. You see successful yogurt making as mostly about temperature. I don't have the patience it takes in order to watch a stove for several hours in hoping my milk doesn't scald and ruin the batch. Which solidifies the thought that purchasing this particular gadget was a smart purchase for me. So I decided it's time to get started.
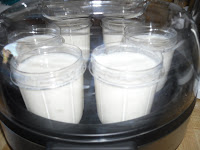
Out comes my Waring Pro Yogurt Maker. Everything is cleaned and dried. Ingredients come out. The recipe I chose was a very straight forward recipe. Milk and Yogurt. You apparently need a yogurt starter in order to make yogurt. Kinda like good sourdough bread, it always needs a starter. Pan hits the stove and milk goes on to heat but no higher than 185 degrees. Then a quick cool to 110 degrees. In a separate bowl I mixed a small portion of the store-bought plain yogurt with some milk and add that to my cooled mixture. Mix together and pour into my little yogurt jars that came with my yogurt maker.
Now we reach the hard part. These steps are really easy since like I said I am a gadget person and I got to use my digital candy thermometer
to warn me of liquid temperatures and such. My son Hayden was with me every step of the way. Aside from the stove cooking this is a really good kitchen project for you and your 5 year old. He enjoyed pouring in the milk and mixing the starter base. As he helped me load up the jars into the maker I explained to him that now comes the hardest part....the waiting. If you do this on the stove you can make yogurt in about 4 hours but if you're like me and don't have to patience to do that nor the patience to entertain a 5 year old while babysitting a stove then you will appreciate this next step. We cover the machine and set the timer for 10 hours.

Poor Hayden, he really did wonderfully in this process. Every now and then he would drag out his step stool to see just how far the process was going. To be honest it took a few hours for me to even notice anything. Most of the changes are visible at the tail end of the process. He would return to see the numbers change on the digital reader. Another feature made specifically for a 5 year old. The digital reader is not like what is on our ovens or microwaves when using a timer with hours and minutes. This digital reader just indicated how many whole hours remain and in the last hour it counts the whole minutes. Every now and then I would hear a little voice in the kitchen declare "4 hours more."
Finally 10 hours arrive and the buzzer buzzes. At this point we could cover and refrigerate the jars and call it done. We however prefer Greek Yogurt so there is more work to do. Out comes the step stool yet again and the boy helps empty the jars into a kitchen towel lined strainer that is placed in a bowl. We tie up the towel and place the whole in the refrigerator for the morning. Now off to bed.
In the morning the boy is up before I am and I waken to the familiar scene of a mom being gently awakened by her son without him speaking a word. I am talking about the silent stare at mommy until she wakes up - but one must do this at about a foot from her face so she can feel the breathing....you been woke up that way? Nothing like starting the heart with a good 'ol fashioned scare before coffee hits the veins. I'm up now.
He is so excited now because he gets to eat his long awaited yogurt. We open the refrigerator and everything is done the way it should be done. The whey drips from the yogurt collecting in the bowl beneith and we now have a nice thick yogurt that is now called Greek Yogurt. I see it is a little too thick, really it's the consistency of cream cheese so I add some of the whey back in, mix, stir, and load of the kids bowls.
Now I must let you know that the yogurt is as plain as plain can be. It's up to us to add our ingredients to suit our tastes. The first day we opted for just plain 'ol honey. and I enjoyed it but the kids thought....eh. This morning I mixed it up kid style. Got granola crunchies out of the pantry, added a sprinkle of brown sugar, a drop of vanilla and for my son a spoonful of berry jam his grandma made for him. Let the kids mix and eat and I have to say if they could have licked their bowls they would have.
Yogurt making takes time but we really enjoyed the exercise and the kids want to make some more. All I have to do now is save a little bit of the plain yogurt from this batch for our next batch and keep it going. Considering how much yogurt this family eats on the norm I can just imagine how much money we will be saving in the long run. This was a most excellent purchase for our family. Granted if you had more patience than I then you could do this all on your stove with your canning equipment but I am glad I did it this way just because of the anticipation factor for my son. Now if you have a yogurt recipe you would like to share with me I’d be happy to try it. Please post away!
Until Next Time, SoCal Marisa
Subscribe to:
Posts (Atom)